
Visuals & Audio
On the canvas, audio and scene images each get their own block. If you don't have them yet, click + Audio or + Scene images in the "Add" row at the bottom of the card. The screen players see is edited under Player interface at the top. Uploaded files live in Panels → Assets.
Character portraits
Give a character a face: on the canvas, right-click that character's lore entry and pick Portrait… (in simple mode, click the camera square next to the character's name). Choose a picture from Assets or upload one on the spot. In chat, that picture and the character's name appear above every line they speak. When several characters have portraits, the AI is asked to start every reply with a hidden [speaker: Name] tag, so the right face is already on screen before the first word arrives. Replies tagged as narration show no face. If a model forgets the tag, the chat falls back to a "Name:" at the start of a line, or a name in the first sentence.
Pictures in the opening
Openings can hold pictures. Click Insert image or video in the top right of the opening's text box, then upload one or pick one from Assets. You can also drag a file onto the text box, or just paste an image. The picture goes in at the cursor as [image:@asset:…|alt=…] and shows up in that spot in chat. After the | you can add: alt= (what the picture is), caption= (a line under it), size=sm|md|lg|full, placement=left|center|right. Plain markdown works too, like , and both styles accept an https:// link instead of an asset.
Player interface
The default chat interface is enough for most cards. If you want opening pages, a status panel, an inventory or a map, build them from templates in Player interface at the top, no code needed. See Player interface.
If you want an interface that's entirely your own, like a green CRT-screen terminal for the end of the world, just describe the look to the Creation assistant: "post-apocalyptic horror UI, CRT monitor aesthetic, dim green glowing text, scanline effects". What it writes is interface code, which you can see in Panels → Front End Code. The interface only displays things. It reads the game state, but it won't go changing it on its own.
The full interface code guide → Advanced: Custom UI Deep Dive
Audio
| Type | Purpose | Example |
|---|---|---|
| BGM | Background music, loops continuously | Tavern theme, battle music, exploration track |
| SFX | One-shot sound effects | Sword clash, creaking door, notification chime |
| Ambient | Environmental loops, layered over the BGM | Rain, forest sounds, crowd murmur |
BGM playlists rotate through tracks automatically, and Conditional BGM switches based on game state (like playing battle music when the variable location is "arena").
Click a track in Panels → Audio to see its Track ID, with Copy ID right next to it. That's the ID to use in your own interface code, like api.playAudio("track-id"). Renaming the track doesn't change it, so your code keeps working.
If you don't want the AI touching a track, click it on the canvas and turn off Allow AI control on the right. The AI can't play, stop or change it anymore, but your interface, behaviors and playlists still can.
Audio patterns and conditional BGM in detail → Advanced: Audio Design
Voices and readout
Players can turn on Voice readout in their own settings to have the story read out. You can give each character a voice: on the canvas, right-click that character's lore entry, pick Voice…, choose one, and click Preview voice to hear it. Characters without a voice use the Narrator voice. If the narrator doesn't have one either, it uses whatever the player picked in their settings.
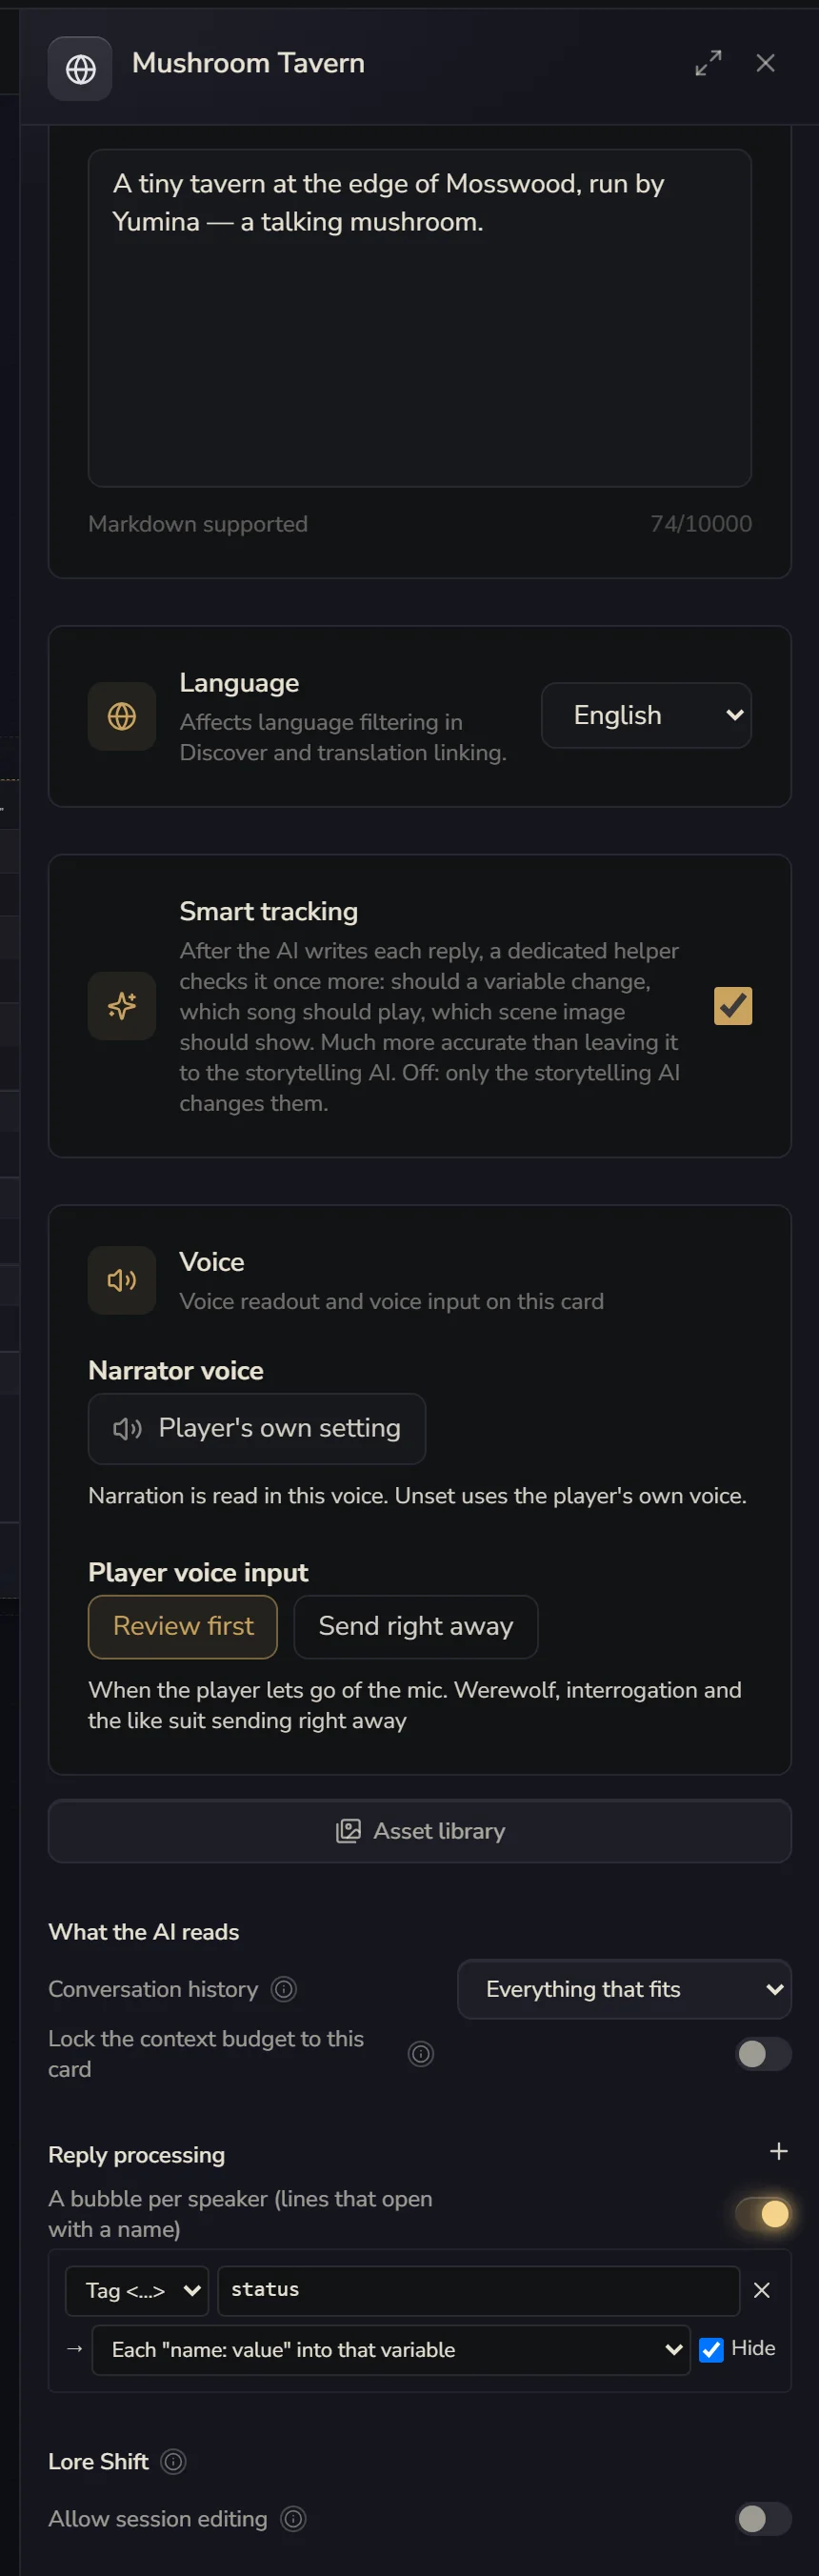
The narrator voice and Player voice input live in the Sound section of Card settings (click Cover & blurb on the right of the canvas, or Panels → Card settings). Player voice input decides what happens when the player holds the mic, speaks and lets go: Review first before sending, or Send right away. Cards built on quick reactions, like werewolf games or interrogations, suit Send right away.
Readout is off for new players, and the voice costs them mushies, so a card can't switch it on by itself. If your card talks out loud (a call, a companion), give it a Turn on her voice button: Yumina asks the player in its own dialog and switches readout on when they say yes. Ask the Studio assistant for a voice companion and it builds the sound check, the mic test, the model switch and the small window (picture-in-picture on phones) for you. How it works: API reference.
Scene images
Pictures that show up on their own. Each scene image has a short id (img1), a picture from your asset library or an https URL, and a sentence or two saying When to show it, like "the cat Minyu gets startled and jumps straight up". That sentence is both the switch and the condition, and it's followed literally. Fill it in, and every reply that meets it carries the picture (write "after every reply" and it shows every turn). Leave it empty, and the picture only shows where you paste its code.
Who places the images is chosen at the top of the scene images page:
- After each reply (default, recommended): once the AI has written its reply each turn, smart tracking checks each picture's "When to show it" condition one by one, and puts every one that matches at the end of that reply. It works just as reliably whatever model the player uses.
- Story AI inserts them: the story-writing AI writes
[image: img1]in its text, so a picture can sit between two paragraphs. But it depends on whether the model listens, and some models almost never do.
If you turn Smart tracking off in Card settings, only the story AI can insert them.
- Add them in the canvas's Scene images block (if there isn't one, click + Scene images at the bottom of the card). Upload from your computer or pick from your asset library. Drag several files in at once and you get several images, each named after its file.
- Write
[image: img1]in an opening to show a picture right from the start. It works in lore entries too: when the AI uses that entry, it brings the picture into its reply. - Under Openings you can limit a picture to certain openings.
- Players get a gallery in the play header. Pictures the story has already shown appear in full. The rest show your Unlock hint, so the player knows there's still a moment worth reaching.
- "When to show it" is followed exactly as written. Write "when the two of them sit across from each other in the café" and only those replies get the picture. Write "after every reply" and every reply gets it. A picture that was shown before comes back whenever its condition holds again.
Assets
You can upload images, audio files, fonts and other media in Panels → Assets. Files are hosted on Yumina's CDN, and you can use them anywhere in custom UI, entries or audio tracks.
In My Library → Assets, upload MP4 or WebM videos with Upload → Upload files. Click the Video filter to find them, then open a video's preview to play it with the built-in controls.
In My Library → Assets, choose Upload → Upload folder, or drag a folder onto the asset area. Check the folder tree and file counts in the preview, then start the import. The folder you picked and its subfolders are saved inside your current asset folder. Empty folders aren't imported.
Folder imports support JPG/JPEG, PNG, GIF and WebP images; TXT, LOG, Markdown (.md / .markdown), CSV and JSON text; MP4 and WebM videos; MP3, WAV, OGG, AAC and M4A audio; and WOFF, WOFF2, TTF and OTF fonts. Unsupported files are listed and skipped.
While a folder imports, the dialog shows the current file's uploaded size, percentage and transfer speed, plus overall progress and how many files are done. Close the dialog or click Upload in background and you can keep browsing other Yumina pages. A floating upload panel shows the progress. Click Details to reopen the dialog. Keep the browser tab open and don't refresh it: once the tab is refreshed or closed, the task can't continue.
Clicking Cancel upload stops the current transfer and the files after it. After cancelling, or if some files fail, click Retry remaining files before removing the task to carry on. Files that already made it won't be uploaded again.
With lots of assets, type a page number in the pagination box at the bottom and click Go or press Enter to jump there. The double arrows at either end take you to the first or last page. The single arrows inside move one page at a time.
AI image generation
You can also make pictures right on the platform. There are three ways in: the AI Image Generation card on the "Create" page, the AI Generation button in the top right of "My Library → Assets", and the AI generation section in the editor.
Write a line describing the picture, pick a model, an aspect ratio and how many images, then click "Generate". The default model costs about 35 mushies per image, charged by actual usage once the image arrives. If no image comes back, you aren't charged. Pictures usually take around 30 seconds, and a notification with a thumbnail tells you when they're done.
Generated pictures go into your asset library (you can pick a folder) and are used just like uploads, with @asset:{id}. You can also take an existing picture as a reference and describe how to change it.
Up to 2 pictures can generate at the same time, and you can submit up to 30 requests an hour. Prompts can't involve minors or face swaps of real people. Requests like that are rejected outright.